Configuring your Remote ID Pro and access to the dashboard
You can gain access to the dashboard by navigating to https://airplate.dk/ and go to our login-page by clicking on the user-icon, in the top right corner.
Or you go directly to the following link: https://app.airplate.dk/login. Here you can log in with the provided Username and Password. If you want to change them, you can do it later on the configuration page.
Dashboard overview
After login, you will be redirected to the dashboard that looks like the image below. Let's do a quick overview of this page.

Menu overview
Beginning with the left side of the page, you have 4 menu items:
- Dashboard: use everytime you want to go back to the main page with the AirMap and overview of your devices;
- Configuration: you can add and edit your Remote ID Pros, pilots and drones;
- History Search: you can see previous fight and its information;
- Map filters: you can choose the way you want the AirMap to look like.
Right below the menu items, you have specific information about the geo-zones. If you click on a specific coloured zone, a label will appear where you will be able to see what is happening there.
Lastly, on the right side of the page, you have your AirPlate account name as well as all your associated Remote ID Pro devices. In these rectangles you see the device serial number, the GNSS status, and the battery level in Volts and percentage, shown when the device is on.
You can see the three possible states of the device in the following:
- Green rectangle and GNSS Status true: Means that the device is on and knows its position.
- Green rectangle and GNSS Status false: The device is on but does not know its position.
- Grey rectangle and GNSS Status false: The device is off.
Configuration
The configuration allows you, as a user, to configure your Remote ID Pros.
The configuration allows the user to:
- Setup/edit your Drone Operator ID;
- Adding Remote ID Pros;
- Add your drones to your AirPlate organisation;
- Configure your Remote ID Pro to transmit your drone’s serial number;
- Add/edit users and pilots to your organisation;
- Changing password.
Without performing this step your Operator ID will not show anything and the Remote ID Pro will transmit its serial number for Direct Remote Identification use.
Setup/edit Operator ID
On the dashboard you will see an overview of all your AirPlate devices. Click on the configuration tab (gear-icon).
Click on the organization name for configuring Operator ID in the right up corner, as you can see in the image below. Here will also see your current Operator ID.
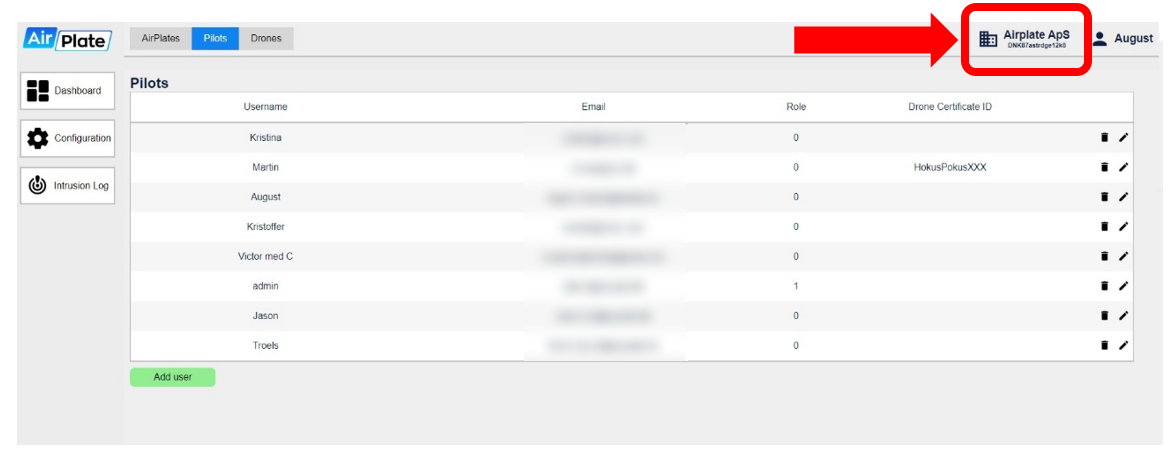
Here you will have the option to change your Operator ID.
NB: Don’t forget to restart the Remote ID Pro for it to take effect.
“A drone operator is any person, or organisation, who owns or rents one or more registered drones. You need to take the initiative yourself to register with your National Aviation Authority, in your country of residence or main place of business.” [Drone operators & pilots | EASA (europa.eu)].
You will receive a document looking similar to the one below, with the registration number (Operator ID) and security code (Security characters).

In the previous example, you can see that the first 3 capitalised letters are the country code, followed by 13 alphanumeric lower-case characters that make up the operator ID, a hyphen (-) and lastly another 3 lower-case alphanumeric characters which are the security characters.
- FIN: 3 upper case letters is the country code;
- 87astrdge12k8: 13 alphanumeric characters (lower cases only), constitute the operator identifying number;
- xyz: 3 alphanumeric characters (lower cases only), which are the security characters.
Adding and editing an Remote ID Pro, pilot or drone
To add a new Remote ID Pro, pilot or drone to your organisation, navigate to the appropriate tab and simply click the 'Add (Pilot/Drone)' button. Once clicked, a form will appear, prompting you to fill in the necessary information. You can always change the information any time as well as delete your Remote ID Pro/pilot/drone, as you can see in the items on the right.
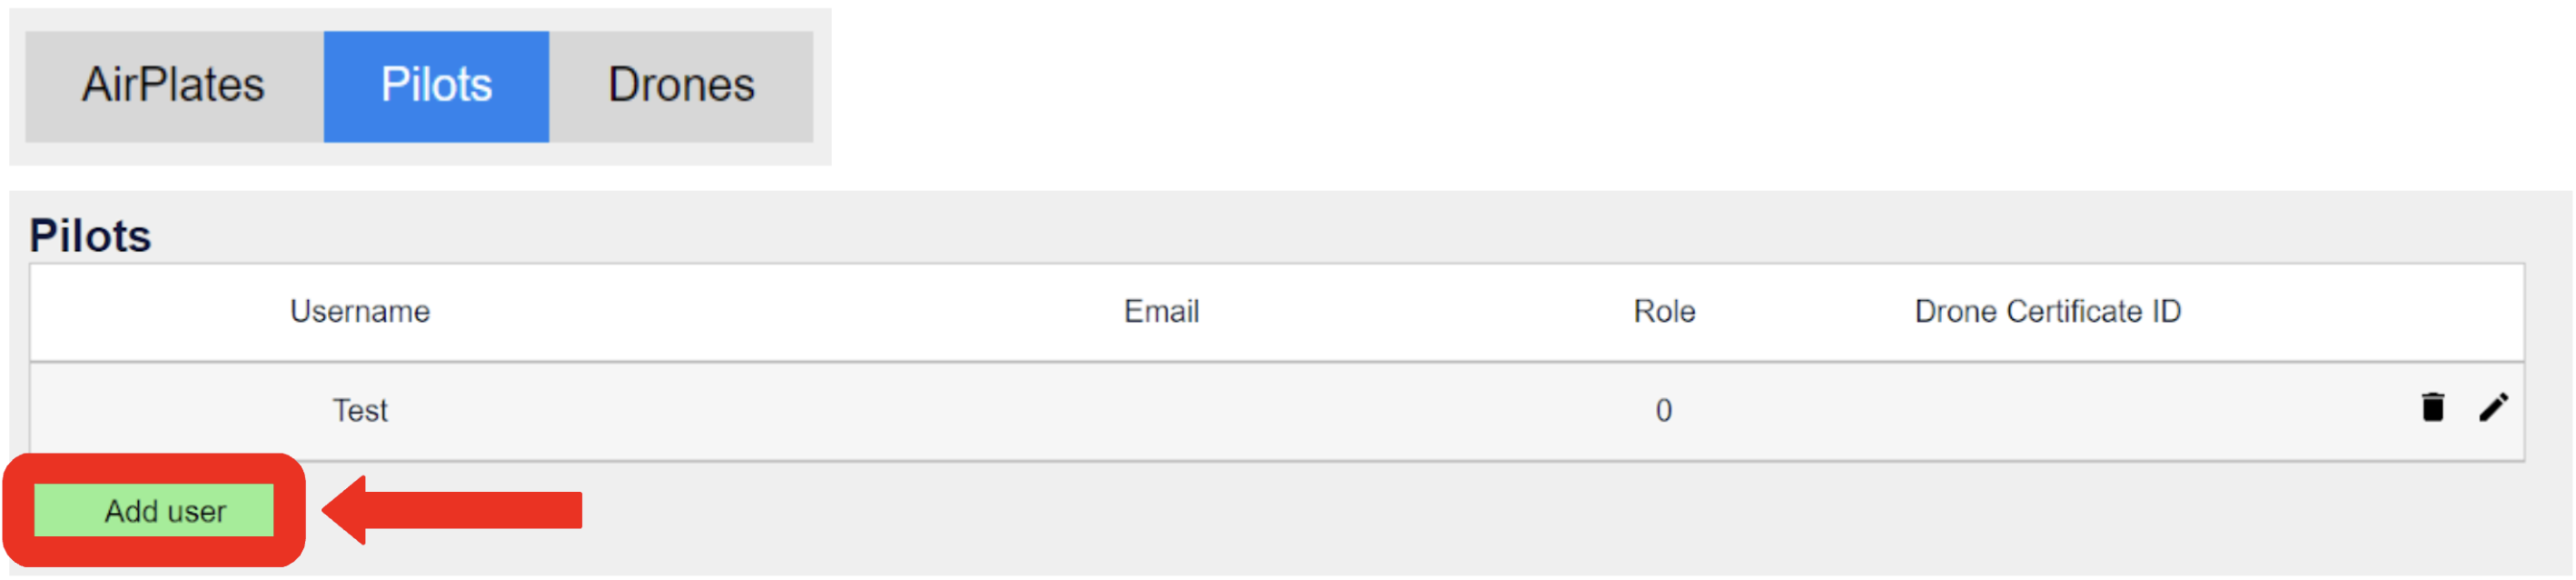
As long as you have an AirPlate account you will automatically have a pilot. We advise you to add your drone, so you can associate the drone’s serial number with the Remote ID Pro.
Add New User
Everytime you add a new user, you are creating a new account that can login to your organisation. To make a new user you need to add the following information:
- Name: Username to access your AirPlate account;
- E-mail: E-mail to access your AirPlate account;
- Password: Password to access your AirPlate account;
- Privilege: This option currently has no functionality but in the future will allow an organization to choose the privilege level, according to which user you want to have control about deleting/editing information from the account.
- Drone Certification ID: This ID is your licence to fly. For more information please visit: EASA - Drone Operators.
Add New Drone
To make a new user you need to add the following information:
- UA serial number: A number provided by the manufacturer of your chosen UAV (consult the resources);
- UA type: Follows the ICAO type list and the model field is referring to the model of your manufactured drone.
- Pilot: This field makes use of the users created before, to assign a pilot.
- Classification type: depends on if the drone has a class in the EU.
- In the advanced options you find a field for other ID numbers which, if acquired, can be input. These are:
- Registration ID: “CAA assigned registration ID”,
- UTM UUID:“unmanned aircraft system traffic management assigned universal unique identification” and
- Specific session ID: Provided by civil aviation authorities.
Add Remote ID Pro
To make a new user you need to add the following information:
- Remote ID Pro identifier: Either comes inside the box or is field automatically when you scan the Remote ID Pro device QR code;
- Remote ID Pro name: Is up to your preference;
- UA Serial number: Was created before in the drone tab and can be assigned to the individual Remote ID Pros here. UA category describes which category will your drone fit in: open, specific or certified.
- Open: you can keep contact with your drone for the entire flight, which ensures less risks;
- Specific: Increased risk of operation eg. flying BVLOS, you need to get approval from your civil aviation authorities;
- Certified: the legislation is not done for it yet, but it will include drones flying with people.
- In the advanced options you find the option to turn on and off NRID, DRI BT 4, DRI BT 5 and DRI Wifi Beacon.
- NRID: determines whether Network Remote Identification is enabled or not. If not enabled, the Remote ID Pro device can’t be seen on the website (AirMap);
- DRI BT 4: determines whether Bluetooth 4 is enabled or not. Bluetooth 4 is an optional broadcasting method. However, if the Remote ID Pro needs to be seen on iOS products it needs to be enabled;
- DRI BT 5: determines whether Bluetooth 5 is enabled or not which is one of the mandatory broadcast means;
- DRI WiFi Beacon: determines whether WiFi Beacon is enabled or not which is one of the mandatory broadcast means;
- NB: Only one of the mandatory broadcast means is required to be enabled in order to be compliant.
- Input max current: (advanced users only) Adjust maximum current draw of device. This highly influences the charging time of the Remote ID Pro.
- Be careful changing this setting if the Remote ID Pro is connected to the drone’s battery. Make sure your drone can supply the desired input current;
- DRI BT strength: adjust broadcast power within regulations;
- DRI Wifi strength: adjust broadcast power within regulations.
- The Remote ID Pro will always be compliant even if changed to the lowest setting.
- Input max current: (advanced users only) Adjust maximum current draw of device. This highly influences the charging time of the Remote ID Pro.
Setting up the Remote ID Pro through RestAPI
It is possible to change the configuration of the Remote ID Pro from our RestAPI. Please contact info@airplate.dk for information and documentation on our RestAPI.